Instructions
-
Set the DISPLAY variable, start the Oracle configuration wizard as root.
# hawizard oracle
-
Read the information on the Welcome screen and click Next.
-
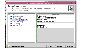
On the Wizard Options dialog box, select the Create Oracle Service Group option and click Next.

Click the thumbnail above to view full-sized image.
-
On the Service Group Configuration dialog box, specify information about the service group.

Click the thumbnail above to view full-sized image.
- Enter a name for the Oracle service group.
- In the Available Cluster Systems box, select the systems on which to configure the service group and click the right-arrow icon to move the systems to the service group's system list.
To remove a system from the service group's system list, select the system in the Systems in Priority Order box and click the button with the left arrow icon.
- To change a system's priority in the service group's system list, select the system in the Systems in Priority Order box and click the buttons with the up and down arrow icons. The system at the top of the list has the highest priority while the system at the bottom of the list has the lowest priority.
- Click Next.
-
On the Instance Selection dialog box, select the Oracle instances to be configured along with their listeners. Click Discover Oracle Configuration, if required.

Click the thumbnail above to view full-sized image.
Click Next.
-
On the Instance Configuration dialog box, specify information for all selected instances.

Click the thumbnail above to view full-sized image.
- Verify the location of the Oracle Parameter File.
- Choose Start and Stop options, if desired.
- Select the Configure detail monitoring and Specify Advanced options check boxes, if desired.
- Click Next.
-
If you chose to monitor the database in detail, the Detail Monitoring dialog box is displayed.

Click the thumbnail above to view full-sized image.
- In the Select column, select the check box corresponding to the database to be monitored in detail.
- Enter a valid user name for the database.
- Enter a valid password for the database user.
 Note
Do not encrypt passwords when entering them through the Agent Configuration Wizard; the wizard takes care of encrypting passwords.
Note
Do not encrypt passwords when entering them through the Agent Configuration Wizard; the wizard takes care of encrypting passwords.
- In the Table column, enter the name of a table that will be queried to validate the status of the database.
- Click Next.
-
If you chose to specify advanced options, the Oracle Advanced Configuration dialog box is displayed.

Click the thumbnail above to view full-sized image.
- Enter the location of the Oracle Envfile and the encoding and select the AutoEndBkup check box, if desired.
- Click Next.
-
On the Database Configuration dialog box, verify the mount points required by each database, specify the Mount and Fsck options, and click Next.

Click the thumbnail above to view full-sized image.
-
On the Listener Configuration dialog box, configure the listeners for the databases.

Click the thumbnail above to view full-sized image.
- Verify the virtual IP address and Netmask.
- For each system, select a device.
- Select the Enable detail monitoring and Specify Advanced options, if desired.
- Click Next.
-
If you chose to specify advanced options for the listeners, the Listener Advanced Configuration dialog box is displayed.

Click the thumbnail above to view full-sized image.
For each listener, enter the path of the Envfile and encoding, if desired. Enter a valid password for the listener. Click Next.
Note
Do not encrypt passwords when entering them through the Agent Configuration Wizard; the wizard takes care of encrypting passwords.
-
On the Service Group Summary dialog, review your configuration.
Click the thumbnail above to view full-sized image.
Click on a resource to view its attributes and their configured values in the Attributes box.
- Change names of resources, if desired; the wizard assigns unique names to resources based on their respective name rules.
To edit a resource name, select the resource name and click on it, press Enter after editing each attribute.
- Review your configuration and click Finish.
The wizard starts running commands to create the Oracle service group. Various messages indicate the status of these commands.
-
On the Completing the Oracle Configuration wizard dialog box, select the Bring the service group online check box to bring the service group online on the local system.

Click the thumbnail above to view full-sized image.
Click Close.
The Oracle service group is created in your cluster.
|