| Netra 20 Installation and User's Guide |
| Netra 20 Installation and User's Guide |
| C H A P T E R 13 |
|
Removing Disk Drives |
This chapter contains procedures for removing and installing an FC-AL hard disk drive.
The chapter contains the following sections:

|
Caution - The plug at the end of the AC power cord is the primary means of disconnection for the Netra 20 AC system. |

|
Caution - To isolate the Netra 20 DC system, open all external circuit breakers. |
The following procedure is concerned with the physical removal and replacement of a hard disk drive as
From an operational point of view, whether a disk can be considered to be a hot swap device and can be removed without shutting down Solaris depends on how the disk drives are configured in the operating environment.
The disk is a hot swap device if:
or if both of the following statements are true:
In other words, if the disk is a root disk and is not mirrored, you must treat it as a non hot swap device.
Before proceeding to remove a hard disk drive, carry out the following:
See Removing the Front Fascia.
2. Use the World Wide Number (WWN) or Target ID to identify the disk.
Target ID Number = Disk Bay Number
Target ID = (Multipack ID x 8) + Drive Bay Number
3. Identify the disk to be removed and the bay in which it is installed.
4. Identify all volumes or applications using the drive.
1. Carry out the steps listed in Preparation.
2. Isolate the drive from the operating environment.
|
Caution - Ensure that no file systems are mounted on the device and back up all data before proceeding. |
Logically remove the drive from the FC-AL bus by typing:
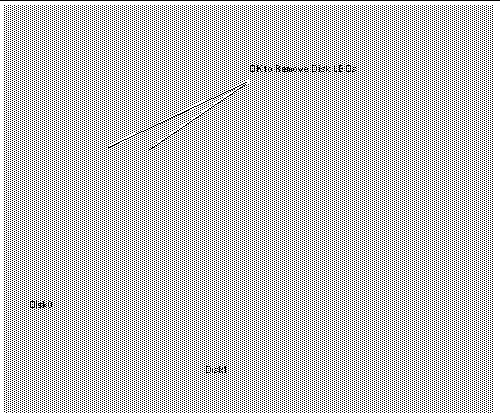
3. Ensure that the OK to Remove Disk LED is lit, then push the disk drive latch downwards to release the drive handle.
4. Using the drive handle, ease the drive from the drive bay until you feel the drive connector disengage from the FC-AL backplane connector.
5. Holding the disk by the handle, slide the disk drive out of the bay.
Support the weight of the drive with your other hand to avoid unnecessary pressure on the drive handle.
6. Place the disk drive on an antistatic mat.
1. Logically add the drive to the FC-AL bus by typing:
2. If necessary, lower the front fascia.
See Removing the Front Fascia.
3. Align the disk drive with the slot in the drive bay.
4. Slide the disk drive into the drive bay until it makes contact with the FC-AL backplane connector.
5. Lock the drive in the bay by pressing on the drive handle until the drive latch closes.
This action engages the drive with the FC-AL backplane connector.
7. Press <Return> to answer the last line of Step 1.
This section describes how to change an unmirrored root disk drive.
Before proceeding to remove a hard disk drive, carry out the following:
1. Use the World Wide Number (WWN) or Target ID to identify the disk.
Target ID Number = Disk Bay Number
Target ID = (Multipack ID x 8) + Drive Bay Number
See Removing the Front Fascia.
3. Identify the disk to be removed and the bay in which it is installed.
4. If the system is running, shut it down and remove the power.
5. Initiate antistatic precautions.
1. Perform the steps listed in Preparation.
2. Push the disk drive latch downwards to release the drive handle.
3. Using the drive handle, ease the drive from the drive bay until you feel the drive connector disengage from the FC-AL backplane connector.
4. Holding the disk by the handle, slide the disk drive out of the bay.
Support the weight of the drive with your other hand to avoid unnecessary pressure on the drive handle.
5. Place the disk drive on an antistatic mat.
1. Perform the steps listed in Preparation, as required.
2. Align the disk drive with the slot in the drive bay.
3. Slide the disk drive into the drive bay until it makes contact with the FC-AL backplane connector.
4. Lock the drive in the bay by pressing on the drive handle until the drive latch closes.
This action engages the drive with the FC-AL backplane connector.
6. Power on the system and perform a reconfiguration boot by typing:
| Netra 20 Installation and User's Guide | 806-7334-13 |
Copyright © 2003, Sun Microsystems, Inc. All rights reserved.