Sun HPC ClusterTools 5 Software Administrator's Guide 5 Software Administrator's Guide
|
| Sun HPC ClusterTools 5 Software Administrator's Guide
|
| C H A P T E R 3 |
|
Overview of Administration Controls |
The Sun HPC cluster's default configuration supports execution of MPI applications. In other words, if you have started the Sun CRE daemons on your cluster and created a default partition, as described in Chapter 2, users can begin executing MPI jobs.You may, however, want to customize the cluster's configuration to the specific requirements of your site.
This chapter provides a brief overview of the features that control a cluster's configuration and behavior. These are:
Sun CRE comprises three master daemons and two nodal daemons:
This section present brief descriptions of the Sun CRE daemons. For complete information on the daemons, see their respective man pages.
tm.rdb is the resource database daemon. It runs on the master node and implements the resource database used by the other parts of Sun CRE. This database represents the state of the cluster and the jobs running on it.
If you make changes to the cluster configuration, for example, if you add a node to a partition, you must restart the tm.rdb daemon to update the Sun CRE resource database to reflect the new condition.
tm.mpmd is the master process-management daemon. It runs on the master node and services user (client) requests made via the mprun command. It also interacts with the resource database via calls to tm.rdb and coordinates the operations of the nodal client daemons.
tm.watchd is the cluster watcher daemon. It runs on the master node and monitors the states of cluster resources and jobs and, as necessary:
tm.omd is the object-monitoring daemon. It runs on all the nodes in the cluster, including the master node, and continually updates the Sun CRE resource database with dynamic information concerning the nodes, most notably their load. It also initializes the database with static information about the nodes, such as their host names and network interfaces, when Sun CRE starts up.
The environment variable SUNHPC_CONFIG_DIR specifies the directory in which the Sun CRE resource database files are to be stored. The default is /var/hpc.
tm.spmd is the slave process-management daemon. It runs on all the compute nodes of the cluster and, as necessary:
tm.spind is the spin daemon. It runs on all the compute nodes of the cluster.
This daemon enables certain processes of a given MPI job on a shared-memory system to be scheduled at approximately the same time as other related processes. This co-scheduling reduces the load on the processors, thus reducing the effect that MPI jobs have on each other.
The hpc_rsmd daemon provides access services to Remote Shared Memory (RSM) resources and manages RSM communications paths on behalf of MPI jobs. If your cluster is not RSM-enabled, you can ignore this section.
An instance of hpc_rsmd runs on each RSM-enabled node of a cluster and:
hpc_rsmd is started when the cluster is booted. After boot, the daemon can be stopped and restarted manually by means of the following script (executed by superuser). This script can also be used to clean up files and System V shared memory segments left behind when an hpc_rsmd instance exits abnormally.
# /etc/init.d/sunhpc.hpc_rsmd [ start | stop | clean ]
Sun CRE provides an interactive command interface, mpadmin, which you can use to administer your Sun HPC cluster. It can only be invoked by the superuser.
This section introduces mpadmin and shows how to use it to perform several administrative tasks:
mpadmin offers many more capabilities than are described in this section. See Chapter 6 for a more comprehensive description of mpadmin.
The mpadmin command has the following syntax:
# mpadmin [-c command] [-f filename] [-h] [-q] [-s cluster_name] [-V]
When you invoke mpadmin with no options, it goes into interactive mode, displaying an mpadmin prompt. It also goes into interactive mode when invoked with the options -f, -q, or -s. In this mode, you can execute any number of mpadmin subcommands to perform operations on the cluster or on nodes or partitions.
When you invoke mpadmin with the -c, -h, or -V options, it performs the requested operation and returns to the shell level.
The mpadmin command-line options are summarized in TABLE 3-1.
|
Suppress the display of a warning message when a non-root user attempts to use restricted command mode. |
|
This section describes the mpadmin options -c, -f, and -s.
Use the -c option when you want to execute a single mpadmin command and return upon completion to the shell prompt. For example, the following use of mpadmin -c changes the location of the Sun CRE log file to /home/wmitty/cre_messages:
# mpadmin -c set logfile="/home/wmitty/cre_messages"
Most commands that are available via the interactive interface can be invoked via the -c option. See Chapter 6 for a description of the mpadmin command set and a list of which commands can be used as arguments to the -c option.
Use the -f option to supply input to mpadmin from the file specified by the file-name argument. The source file is expected to consist of one or more mpadmin commands, one command per line.
This option can be particularly useful in the following ways:
Use the -s option to connect to the cluster specified by the cluster-name argument. A cluster's name is the host name of the cluster's master node.
The mpadmin commands apply to a certain cluster, determined as follows:
To use mpadmin, you need to understand the concepts of object, attribute, and context as they apply to mpadmin.
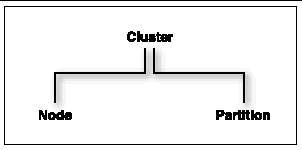
From the perspective of mpadmin, a Sun HPC cluster consists of a system of objects, which include
Each type of object has a set of attributes, which control various aspects of their respective objects. For example, a node's enabled attribute can be
Some attribute values can be operated on via mpadmin commands.
mpadmin commands are organized into three contexts, which correspond to the three types of mpadmin objects. These contexts are summarized below and illustrated in FIGURE 3-1.
In interactive mode, the mpadmin prompt contains one or more fields that indicate the current context. TABLE 3-2 shows the prompt format for each of the possible mpadmin contexts.
To introduce the use of mpadmin, this section steps through some common tasks the administrator may want to perform. These tasks are:
mpadmin provides various ways to display information about the cluster and many kinds of information that can be displayed. However, the first information you are likely to need is a list of the nodes in your cluster.
Use the list command in the Node context to display this list. In the following example, list is executed on node1 in a four-node cluster.
node1# mpadmin[node0]:: node[node0] Node:: list node0 node1 node2 node3[node0] Node::
The mpadmin command starts up an mpadmin interactive session in the Cluster context. This is indicated by the [node0]:: prompt, which contains the cluster name, node0, and no other context information.
|
Note - A cluster's name is assigned by Sun CRE and is always the name of the cluster's master node. |
The node command on the example's second line makes Node the current context. The list command displays a list of all the nodes in the cluster.
Once you have this list of nodes, you have the information you need to enable the nodes and to create a partition. However, before moving on to those steps, you might want to try listing information from within the cluster context or the partition context. In either case, you would follow the same general procedure as for listing nodes.
If this is a newly installed cluster and you have not already run the part_initialize script (as described in "Create a Default Partition" on page 8), the cluster contains no partitions. If, however, you did run part_initialize and have thereby created the partition all, you might want to perform the following test.
node1# mpadmin[node0]:: partition[node0] Partition:: list all[node0] Partition::
To see what nodes are in partition all, make all the current context and execute the list command. The following example illustrates this; it begins in the Partition context (where the previous example ended).
[node0] Partition:: all[node0] P[all]:: list node0 node1 node2 node3[node0] P[all]::
A node must be in the enabled state before MPI jobs can run on it.
Note that enabling a partition automatically enables all its member nodes, as described in the next section.
To enable a node manually, make that node the current context and set its enabled attribute. Repeat for each node that you want to be available for running MPI jobs.
The following example illustrates this, using the same four-node cluster used in the previous examples.
node1# mpadmin[node0]:: node0[node0] N[node0]:: set enabled[node0] N[node0]:: node1[node0] N[node1]:: set enabled[node0] N[node1]:: node2[node0] N[node2]:: set enabled[node0] N[node2]:: node3[node0] N[node3]:: set enabled[node0] N[node3]::
Note the use of a shortcut to move directly from the Cluster context to the node0 context without first going to the general Node context. You can explicitly name a particular object as the target context in this way so long as the name of the object is unambiguous--that is, it is not the same as an mpadmin command.
mpadmin accepts multiple commands on the same line. The previous example could be expressed more succinctly as:
node1# mpadmin[node0]:: node0 set enabled node1 set enabled node2 set enabled node3 set enabled[node0] N[node3]::
To disable a node, use the unset command in place of the set command.
You must create at least one partition and enable it before you can run MPI programs on your Sun HPC cluster. Even if your cluster already has the default partition all in its database, you will probably want to create other partitions with different node configurations to handle particular job requirements.
There are three essential steps involved in creating and enabling a partition:
Once a partition is created and enabled, you can run serial or parallel jobs on it. A serial program runs on a single node of the partition. Parallel programs are distributed to as many nodes as Sun CRE determines appropriate for the job.
|
Note - There are no restrictions on the number or size of partitions, so long as no node is a member of more than one enabled partition. |
The following example creates and enables a two-node partition named part0. It then lists the member nodes to verify the success of the creation.
node1# mpadmin[node0]:: partition[node0] Partition:: create part0[node0] P[part0]:: set nodes=node0 node1[node0] P[part0]:: set enabled[node0] P[part0]:: list node0 node1[node0] P[part0]::
The next example shows a second partition, part1, being created. One of its nodes, node1, is also a member of part1.
[node0] P[part0]:: up[node0] Partition:: create part1[node0] P[part1]:: set nodes=node1 node2 node3[node0] P[part1]:: list node1 node2 node3[node0] P[part1]::
Because node1 is shared with part0, which is already enabled, part1 is not being enabled at this time. This illustrates the rule that a node can be a member of more than one partition, but only one of those partitions can be enabled at a time.
Note the use of the up command. The up command moves the context up one level, in this case, from the context of a particular partition (that is, from part0) to the general Partition context.
Sun CRE can configure a partition to allow multiple MPI jobs to be running on it concurrently. Such partitions are referred to as shared partitions. Sun CRE can also configure a partition to permit only one MPI job to run at a time. These are called dedicated partitions.
In the following example, the partition part0 is configured to be a dedicated partition and part1 is configured to allow shared use by up to four processes.
node1# mpadmin[node0]:: part0[node0] P[part0]:: set max_total_procs=1[node0] P[part0]:: part1[node0] P[part1]:: set max_total_procs=4[node0] P[part1]::
The max_total_procs attribute defines how many processes can be active on each node in the partition for which it is being set. In this example, it is set to 1 on part0, which means only one process can be running at a time. It is set to 4 on part1 to allow up to four processes to run on that partition.
Note again that the context-changing shortcut (introduced in "Enabling Nodes" on page 20) is used in the second and fourth lines of this example.
Two cluster attributes that you may wish to modify are logfile and administrator.
The logfile attribute allows you to log Sun CRE messages in a separate file from all other system messages. For example, if you enter
[node0]:: set logfile=/home/wmitty/cre-messages
Sun CRE will output its messages to the file /home/wmitty/cre-messages. If logfile is not set, Sun CRE messages will be passed to syslog, which will store them with other system messages in /var/adm/messages.
|
Note - A full path name must be specified when setting the logfile attribute. |
You can set the administrator attribute to specify, say, the email address of the system administrator. To do this:
[node0]:: set administrator="root@example.com"
Note the use of double quotes.
Use either the quit or exit command to quit an mpadmin interactive session. Either causes mpadmin to terminate and return control to the shell level.
[node0]:: quitnode1#
When Sun CRE starts up, it updates portions of the resource database according to the contents of a configuration file named hpc.conf. This file is organized into functional sections, which are summarized here and illustrated in TABLE 3-3.
You can change any of these aspects of your cluster's configuration by editing the corresponding parts of the hpc.conf file. Default settings are in effect if you make no changes to the hpc.conf file as provided.
To illustrate the process of customizing the hpc.conf file, this section explains how to:
|
Note - The hpc.conf file is provided with the Sun HPC ClusterTools software. |
|
Note - You may never need to make any changes to hpc.conf. If you do wish to make changes beyond those described in this section, see Chapter 6 for a fuller description of this file. |
Perform the steps described below to stop the Sun CRE daemons and copy the hpc.conf template.
Stop the Sun CRE daemons on all cluster nodes. For example, to stop the Sun CRE daemons on the cluster nodes, node1 and node2 from a central host, enter
# ./ctstopd -n node1,node2 -r connection_method |
where connection_method is rsh, ssh, or telnet. Or, you can specify a nodelist file instead of listing the nodes on the command line.
# ./ctstopd -N /tmp/nodelist -r connection_method |
where /tmp/nodelist is absolute path to a file containing the names of the cluster nodes, with each name on a separate line. Comments and empty lines are allowed. For example, if the cluster contains the nodes node1 and node2, a nodelist file for the cluster could look like the following:
# Sample Node List node1 node2 |
The Sun HPC ClusterTools software distribution includes an hpc.conf template, which is stored, by default, in /opt/SUNWhpc/examples/rte/
hpc.conf.template.
Copy the template from its installed location to /opt/SUNWhpc/etc/hpc.conf and edit it as described below in this section.
When you have finished editing hpc.conf, you need to update the Sun CRE database with the new configuration information. This step is described in Updating the Sun CRE Database.
The MPIOptions section provides a set of options that control MPI communication behavior in ways that are likely to affect message-passing performance. It contains a template showing some general-purpose option settings, plus an example of alternative settings for maximizing performance. These examples are shown in TABLE 3-4.
The options in the general-purpose template are the same as the default settings for the Sun MPI library. In other words, you do not have to uncomment the general-purpose template to have its option values be in effect. This template is provided in the MPIOptions section so that you can see what options are most beneficial when operating in a multiuser mode.
If you want to use the performance settings, do the following:
The resulting template should appear as follows:
Begin MPIOptionscoscheduling offspin onEnd MPIOptions
The significance of these options is discussed in Chapter 6.
When you have finished editing hpc.conf, update the Sun CRE database with the new information. For example, to start the daemons on cluster nodes node1 and node2 from a central host, enter
# ./ctstartd -n node1,node2 -r connection_method |
where connection_method is rsh, ssh, or telnet. Or, you can specify a nodelist file instead of listing the nodes on a command line.
# ./ctstopd -N /tmp/nodelist -r connection_method |
where /tmp/nodelist is absolute path to a file containing the names of the cluster nodes, with each name on a separate line.
Sun CRE provides basic security by means of a cluster password, which is stored in a key file on each node.
In addition, you can set up further methods of guarding the cluster against access by unauthorized users or programs. Sun CRE supports UNIX system authentication (via rhosts), as well as two third-party mechanisms for authentication: Data Encryption Standard (DES) and Kerberos Version 5.
Sun CRE uses a root-read-only key file to control access to the cluster. The key file must exist on every node of the cluster, and the contents of all the key files must be identical. In addition, the key file must be placed on any node outside the cluster that might access the cluster (that is, on any node that may execute the command mprun -c cluster_name).
The key resides in /etc/hpc_key.cluster_name on each node.
The installation procedure creates a default key file on each node of the cluster. A strongly recommended step in the post-installation procedure is to customize the key immediately after installing the Sun HPC ClusterTools software. The key should be 10-20 alphanumeric characters.
The administrator can change the key at any time. As superuser, run the set_key script on each node in the cluster and on any nodes outside the cluster that may access the cluster:
# /etc/opt/SUNWhpc/HPC5.0/etc/set_key
It is preferable to stop the Sun CRE daemons before changing the key, since a current MPI job might fail.
To guarantee that the cluster key is set identically on every node, you should use the Cluster Console Manager tools (described in Appendix A) to update all the key files at once.
|
Note - The cluster password security feature exists in addition to the "current" authentication method, as specified in the hpc.conf file and described below. |
Authentication is established in the configuration file hpc.conf in the section CREOptions.
Begin CREOptions ... auth_opt sunhpc_rhosts End CREOptions |
The value of the auth_opt option is one of:
To change authentication methods, stop all Sun CRE daemons, edit the hpc.conf file, and then restart the Sun CRE daemons. See Preparing to Edit hpc.conf.
When authentication option rhosts is in use, any Sun CRE operation (such as mpadmin or mprun) attempted by the superuser will be allowed only if three items:
appear in one of the following files:
The sunhpc_rhosts file's contents are visible only to the superuser.
To allow superuser access from hosts outside the cluster, the node name must be added to the /etc/sunhpc_rhosts file.
If the /etc/sunhpc_rhosts file is not used (or has been removed), the .rhosts file on each node must be updated to include the name of every node in the cluster. Using .rhosts assumes trusted hosts. For information on trusted hosts, see the man page for hosts.equiv.
In order to use DES authentication with Sun CRE, host keys must exist for each host in the cluster and /etc/.rootkey must exist for each node of the cluster. User keys must exist on all hosts that will be used to communicate with the cluster using Sun CRE commands, as well as on each node of the cluster (including the master), for each user who is to access the cluster. Inconsistent key distribution will prevent correct operation.
To set up DES authentication, you must ensure that all hosts in the system, and all users, have entries in both the publickey and netname databases. Furthermore, the entries in /etc/nsswitch.conf for both publickey and netid databases must point to the correct place. For further information, see the Solaris man pages for publickey(4), nsswitch.conf(4), and netid(4).
After all new keys are in place, you need to restart the DES keyserver keyserv. You must also establish /etc/.rootkey on each node, as described in the man page keylogin(1).
When the DES setup is complete, restart the Sun CRE daemons (see Stopping and Restarting Sun CRE).
It is recommended that you use one of the Cluster Console Manager tools (cconsole, ctelnet, or crlogin) to issue identical commands to all the nodes at the same time. For information about the Cluster Console Manager, see Appendix A.
|
Note - While DES authentication is in use, users must issue the keylogin command before issuing any commands beginning with mp, such as mprun or mpps. |
To set up Kerberos 5 authentication, the administrator registers a host principal (host) and a Sun CRE (sunhpc) principal with an instance for each node that is to be used as a Sun CRE client. In addition, each host must have host and principal entries in the appropriate keytabs.
For example: consider a system consisting of three nodes (node0, node1, and node2), in Kerberos realm example.com. Nodes node0 and node1 will be used as Sun CRE servers and all three nodes will be used as Sun CRE clients. The database should include the following principals as well as principals for any end-users of Sun CRE services, created using the addprinc command in kadmin:
sunhpc/node0@example.com
sunhpc/node1@example.com
sunhpc/node2@example.com
host/node0@example.com
host/node1@example.com
host/node2@example.com
The sunhpc and host principals should have entries in the default keytab (created using the ktadd command in kadmin).
Any user who wishes to use Sun CRE to execute programs must first obtain a ticket granting ticket via kinit.
For further information on Kerberos version 5, see the Kerberos documentation.
| Sun HPC ClusterTools 5 Software Administrator's Guide
| 817-0083-10 |
Copyright © 2002, Sun Microsystems, Inc. All rights reserved.